Feeds:
Posts
Comments

This is small yet useful thing.

I was looking to add Google +1 button to my blog, which is hosted on wordpress.com. And it doesn’t give access to edit the code .

There are many widgets available for google +1 button on web (like  : http://wordpress.org/extend/plugins/google-1-widget/), but it requires to edit the code, so its not helpful if blog is hosted on wordpress.com.

Finally i fund the solution, there is a section under Settings tab in Dashboard called Sharing (Settings > Sharing)  where you can find options of adding Google +1 button , facebook share/like , twitter , linked-in, print button etc. and few other options too.


This is just a re-sharing of my past article @GatewayTechnolabs Blog.

For whom the client side scripting becomes a headache OR for those who loves client side scripting… jQuery is a great way of doing client side scripting with ease and fun. Playing with HTML DOM elements using jQuery is really a fun and as easy as writing ABCD 🙂


Introduction:  jQuery is actually an Open Source cross-browser JavaScript library which is allows faster and easier JavaScript development then the traditional JavaScript development.

There are 7 things which gives power to the developers for building robust and excellent client side scripts.

1 – Cross browser support :

Those who have ever written traditional JavaScript, they must have faced problems with diff. browser support and it becomes a tedious stuff for detecting browser behaviors and writing separate logics for all , but jQuery has wiped out all those problem by giving cross browser support. So no more cross-browsing compatibility issues here.

2 – jQuery selectors , manipulation & Traversing

Every web developers must have used CSS and its syntax for defining styles by class (with DOT) / elements  / element ID (using #), jQuery also uses all common CSS syntax for selecting a set of DOM elements which is called jQuery Selectors.

i.e. $(“#sample”)  will return all the DOM elements with [ ID = sample ]

$(“div.xyz span#abc”) will return only those <span> elements with ID= abc and are child of a <div> with class name “xyz”

To learn more you can visit : http://api.jquery.com/category/selectors/

3 – jQuery EventBinding

jQuery supports all such events like click ,mouse over/move,load, etc. Writing event on any set of DOM elements are also becomes easier with JQ, by just passing a function as a parameter in event binding.

its as easy as this : $(“#sample”).click(function(){ alert(‘Hi there !’); });

To learn more you can visit : http://api.jquery.com/category/events/

4 – Callback functions

jQuery also facilitates the callback functions in many methods which becomes useful while working with animations or any timer based functionalities.

i.e. : $(“#sample”).show(“slow”, [ optional callback function ] );

5 – Utilization of JSON

JSON stands for “JavaScript object notation”. Use of JSON everywhere as an optional parameters makes jQuery more flexible and powerful for passing a set of parameters.

Jquery utilizes JSON format widely in most of inbuilt functions ,all AJAX methods and in jQuery plug-in development as well.

i.e. : $(“#sample”).css({height:”40px”, color:”black” });

6 – jQuery AJAX

jQuery gives a variety of AJAX functionalities to the developers with extensive use of callbacks for different AJAX events, and a good thing about jQuery AJAX is that we don’t have to take care about cross-browser compatibility issues. and no need to take care of xmlHTTP object n all.

It gives different functions for all kind of developer’s needs

i.e. $(“#sample”).load( [ URL] ); – a very basic function, which will load the HTML from the specified URL into #sample.

To learn more visit : http://api.jquery.com/category/ajax/

7 – jQuery plugins

jQuery plug-in is a concept or we can say a mechanism of making our own functionality generalized by packaging it all together as a plug-in.

jQuery plug-in offers great portability to the code and of course code re-usability with ease.

To learn more visit : http://docs.jquery.com/Tutorials:Getting_Started_with_jQuery#Plug_me:_Writing_your_own_plugins

8 – JQuery UI

jQuery UI is an Open Source library which is built on core jQuery.

It can be used to built highly interactive web applications,

jQuery UI offers a wide range of inbuilt functions for animations, effects , themes mechanism , rich  UI widgets and complex behaviors like Drag-Drop , resizing , selection & sorting.

  • jQuery UI categories all functionalities in main 3 section given below
    • Interaction: Covers complex behaviors like Drag-Drop elements, Resizing and Sorting. And provides a wide range of options for handling different behaviors and scenarios
    • Widgets: Fully functional rich UI elements (ultimately jQuery plug-ins) with a Rich User Interface and flexible theming options.
    • Effects: Enables supports of various animation and transition effects like slide,blind,bounce, drop,fade etc.

To learn more visit : http://jqueryui.com/demos/

Enjoy playing with jQuery 🙂

Code Project

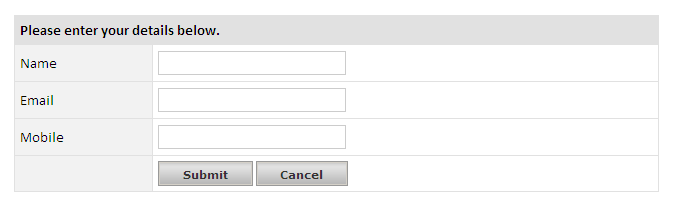
Implementing Model popup Plug In

As shown in above screen, developing Model Popup will require 2 layers:

  1. Disabled Back ground
  2. Popup content Panel

We will implement a plug In and call it on Popup Panel element.

Somewhat like: $(“div.popupDiv”).ShowPopup();

ShowPopup();
Is a plug-In method which will initiate an instance of the plug-In which we going to implement as next step.

Prior to that a CSS for Disabled background needs to be developed

Which we can achieve as below:

.popupbackGround

{

position: absolute;

height: 100%;

width: 100%;

left: 0px;

top: 0px;

background-color: #000;

z-index: 1;

opacity: 0.5;

filter: alpha(opacity =50);

display: none;

}

We don’t have to assign this CSS class anywhere in HTML, but we will use this class while implementing Plug-In.

Next to this, we will implement Model Popup J-Query Plug-In.

Parameter to be passed to Plug-In: closeButtonCSS

The plug in will be called on the popup panel itself and take one parameter called CloseButtonCSS which will be used to close the Model popup.

We will create close event on the specified close button in parameter.

model-popup.js (Plug-In file)

jQuery.noConflict();

(

function($K){

$K.fn.ShowPopup=function(data)

{

/* Parameters: closeButtonCSS */

$K(this).each(function(i)

{

var dbBack,intTopAxis=0;

var objCloseButton= $K(“.” + data.closeButtonCSS);

var objPopup= $K(this);

var a;

objCloseButton.click(function(){ HidePopup(); });

$K(window).scroll(function(){

var xTop= parseInt($K(window).scrollTop()) + intTopAxis ;

objPopup.animate({top:xTop+ “px”},{queue: false, duration: 350});

});

initBackGround = function(){

dbBack = $K(“<div></div>”).attr(“class”,“popupbackGround”).css(“height”,$K(document).height()).hide();

$K(“body”).append(dbBack);

intTopAxis= parseInt(($K(window).height())/2)-(objPopup.height()/2); }

ShowPopup = function(){ initBackGround();

dbBack.fadeIn(function(){objPopup.show();

});

objPopup.css({“left”: (($K(window).width())/2)-(objPopup.width()/2),“top”: (($K(window).height())/2)-(objPopup.height()/2)+parseInt($K(window).scrollTop())});

}

HidePopup = function() {

objPopup.fadeOut(); dbBack.fadeOut();

}

ShowPopup();

});

}

})(jQuery);

How to call Model Popup

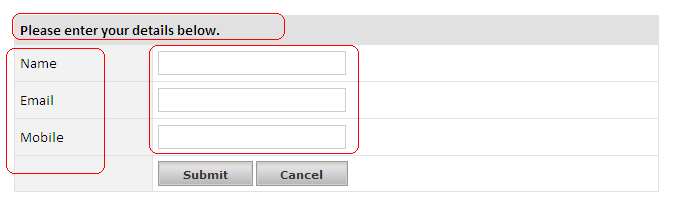
Popup Plug-In can be called on any Div object. And the DIV itself will get displayed as a popup like shown in the above screen.

For example:

Target popup DIV class is popupDiv.


<div class=”popupDiv”>

<div>Popup Content Goes Here.. </div>

<div class=”close”><class=”lnkClose”> <img src=”resource/small-closelabel.gif” /></a>

</div>

</div>

We can popup by placing the following javascript :

$k(“div.popupDiv”).ShowPopup(

{

closeButtonCSS:“lnkClose”

});

Here “closeButtonCSS:“lnkClose” is used to treat lnkClose as close button of popup.

Playing FLV

To play any FLV file in HTML will require a flash based FLV player. There are many FLV players available among of those we will use one, which is a flash file and we can play FVL using the flash FLV player.

Here we will require 2 flash (SWF) files:

  1. flvplayer.swf (download )
  2. SteelExternalAll.swf (needs to be placed on same path of container HTML page) (Download)

Below is how to embed object in HTML page to play FLV using above FLV player.

<object id=”Object1″ height=”380″ width=”400″ classid=”clsid:D27CDB6E-AE6D-11cf-96B8-444553540000″ codebase=”http://macromedia.com/cabs/swflash.cab#version=6,0,0,0″&gt;

<param name=”movie” value=”flash/flvplayer.swf” />

<param name=”FlashVars” value=”flvurl=../flash/test.flv” />

<param name=”quality” value=”high” />

<param value=”true” name=”autoplay” />

<embed height=”380″ width=”400″ src=”flash/flvplayer.swf” flashvars=”flvurl=../flash/test.flv” type=”application/x-shockwave-flash” />

</object>

Above code will take FLV file path as a parameter, that is been specified at 2 places.

  1. flashvars=”flvurl=../flash/test.flv”
  2. <param name=”movie” value=”flash/flvplayer.swf” />

Your FLV file path will go here.

Putting all together

Now we got both things ready with us.

  1. Implemented J-Query plug-In for model popup
  2. FLV player

Simply placing the <object> tag inside the Popup Div will result in our targeted output.

In addition to that we will require a Button to be clicked to show model popup. Like shown below

<a class=”lnkPopup”>Play FLV in Popup</a>

Let’s create a simple J-Query click event of the above link and call popup plug-In inside click event, like shown below.

<script type=”text/javascript” language=”javascript”>

var $k=jQuery.noConflict();

$k(document).ready(function(){

$k(“a.lnkPopup”).click(function()

{

$k(“div.popupDiv”).ShowPopup(

{

closeButtonCSS:“lnkClose”

});

});

});

</script>

You can also download full source code ZIP file by clicking here .

CSS3 gives a great flexibility to designers to create optimized HTML by utilizing CSS3 features.

CSS3 selectors gives rich amount of DOM element filtering, which will let designers to minimize inline attributes and inline styles in HTML code.

Here I am giving an overview of how to utilize CSS3 to develop an HTML form as shown below.

We will try to optimize HTML as much as possible by giving all styles and attributes through CSS3 in css file itself.

Form Concept:

As shown in below screen, we will be dividing form into 4 pieces,

  1. Header part (<th> )
  2. Left side labels (<td>)
  3. Right side textbox area (<td> & <input type=”text” /> )
  4. Bottom Buttons ( <input type=”submit”/> )

Generating Simple HTML form:

As shown in below HTML, we will not give any attributes to TABLE or TD.

Just a simple Table with only one class which is assigned to TABLE, like class=”tblform”. Very neat HTML without any kind of attributes assigned.

HTML file code

<table class=”tblform”>

<tr>

<th colspan=”2″>Please enter your details below.</th>

</tr>

<tr>

<td>Name</td>

<td><input type=”text”/></td>

</tr>

<tr>

<td>Email</td>

<td><input type=”text”/></td>

</tr>

<tr>

<td>Mobile</td>

<td><input type=”text”/></td>

</tr>

<tr>

<td>

</td>

<td><input type=”submit” value=”Submit”/> <input type=”submit” value=”Cancel”/></td>

</tr>

</table>

Developing CSS file:

Once we got the above HTML ready, our all focus will be now on CSS to make it look like as shown in above screen shot,

In HTML there is only 1 CSS class assigned to TABLE which is tblform.

Further will be doing all stuffs in the CSS as given below,

CSS file code

.tblform

{

border-collapse: collapse;

width: 100%;

font-family: Calibri;

font-size: 11pt;

}

.tblform td

{

padding: 5px;

border: solid 1px #E1E1E1;

}

.tblform th

{

padding: 5px;

border: solid 1px #E1E1E1;

font-weight: normal;

text-align: left;

background-color: #E1E1E1;

font-weight: bold;

}

.tblform td input[type=text]

{

border: 1px solid #CCCCCC;

width: 180px;

height: 20px;

padding-left: 5px;

}

.tblform td:first-child

{

padding: 5px;

border: solid 1px #E1E1E1;

background-color: #F2F2F2;

}

.tblform td input[type=submit], .tblform td input[type=submit]:hover

{

background-image: url(button-bg.gif);

background-repeat: repeat-x;

line-height: 22px;

height: 25px;

font-family: Verdana, Arial,Helvetica,sans-serif;

font-weight: bold;

font-size: 11px;

color: #333333;

padding: 0px 10px 0px 10px;

border: 1px solid #999999;

cursor: pointer !important;

}

That’s it, it will result in a nice form with all CSS applied and HTML will remain neat as it is.

Understanding sys.objects:

Sys.objects is a system VIEW in SQL Server 2005, for each SQL database there is a separate sys.object view which gets stored within databse itself.

Using Sys.objects returns list of all database objects and its types, type can be either of given below:

DB OBJECT TYPES

F     FOREIGN_KEY_CONSTRAINT

IT    INTERNAL_TABLE

PK    PRIMARY_KEY_CONSTRAINT

S     SYSTEM_TABLE

SQ    SERVICE_QUEUE

U     USER_TABLE

V     VIEW

How to DELETE all User Tables , stored procedures , UDF’s and Views using cursor

Use [database name]

declare @q nvarchar(max)

declare @name nvarchar(max);

declare @type nvarchar(max);

declare cur cursor for

select name ,type from sys.objects where type in(‘p’,‘fn’,‘v’,‘u’);

open cur;

fetch next from cur into @name,@type

while @@fetch_status = 0

begin

if(@type=‘p’)

begin

set @q=N‘drop procedure ‘ + @name;

end

if(@type=‘fn’)

begin

set @q=N‘drop function ‘ + @name;

end

if(@type=‘v’)

begin

set @q=N‘drop view ‘ + @name;

end

if(@type=‘u’)

begin

set @q=N‘drop table ‘ + @name;

end

exec sp_executesql @q;

fetch next from cur into @name,@type

end

close cur;

deallocate cur;

Encapsulation: is an ability of hiding data or methods from the rest of the world.

Inheritance: is a concept of passing and using attributes of base class into derived class.

Polymorphism: single name – multiple use, it can be achieved via Function overloading & operator overloading.

Class & object: a class is a definition which describes all attributes of entity or an object. And object is an instance of a class.

Overloading: is the concept of using function or class with same name but different implementation by changing types of parameters

Static or shared: a keyword to define static class, members of static class doesn’t require creating instance of that class.

Virtual: indicated that this base class method is to be overridden. [Without specifying virtual keyword also method can be override, but it makes code more understandable]

Sealed: indicates that this base class method not to be override.

Overriding: is a concept of implementing a method in derived class with same definition of the base class method

Shadowing: without overriding a method derived class can do new implementation where parameters, return type & access modifier may differ from the base class implementation, Shadow is the keyword in C#

Constructor: is a method with same name as class, it gives a way to initiate the class members to default values at the time of object creation, automatically calls whenever class object is created

Static constructor: a type of constructor, calls at the first time object creation.

Serialization: is the process of converting object into a stream of bytes. De-serialization is the reverse process.

Delegate: holds a reference to a function. Type safe pointer

Multicast delegate: holds reference to multiple functions, its return type must be void.

Interface & Abstract:

Abstract class Interface
Is a class to provide common fields/members to subclasses Is a collection of member definitions to be implemented in derived class
a class can inherit only 1 abstract class A class can implement many interface
Members of abstract class can have any access modifier All members are only public by default, it can’t be changed
Abstract class method may or may not have implementation Interface can have only definition of methods, no implementation


Normalization: is a process of organizing data and minimizing redundancy

De-normalization: is a technique to move from higher to lower normal forms of database modeling in order to speed up database access.

Stored Procedure: is a named group of T-SQL statements which can be created and stored in Database as an object.

Primary Key: is a unique identifier of a row in a DB table, [it can’t be NULL]

Unique key: forces uniqueness to a respective table column, [it can be NULL]

Foreign Key: a foreign key in 1 table refers to the primary key in other table, Used to force referential integrity.

Inner join: exists in both tables

Left Outer join: all records from left side table + matched rows from right side table (totals number of rows will be same as left table)

Right Outer join: all records from right side table + matched rows from left side table (totals number of rows will be same as right table), it’s a mirror image of left outer join

Full Outer join: all records from left side table + all records from right side table, weather matched or not

Cross join: returns [left table rows * right table rows], a Cartesian product of both tables

Self join: when table joins to itself using diff aliases to avoid confusion

Union: selects only distinct records from both tables

Union all: selects all records from both tables

View: is a subset of a table, can be used to retrieve data, insert or Update data. Can contain multiple select statements inside

Trigger: A trigger is a SQL procedure that initiates an action when an event (INSERT, DELETE or UPDATE) occurs.

Cursor: is a database object used to loop trough records on row by row bases.

Index: pointers to data records, represents structure of how data get stored physically in a table

Clustered index Non clustered index
Reorders physical data stored in table It contains pointers to data rows
A table can have Only 1 clustered index A table can have one OR many non-clustered index
Table is having By default a clustered index
Leaf nodes contains data Leaf nodes contains reference to data

Linked server: is a concept of adding other remote server to a group to query DB’s of both servers together

Collation: set of rules that determines how data stores & compares in database

Collation types: case sensitive, accent sensitive, kana sensitive, width sensitive

Data ware housing:

  1. Record should Never delete from DB
  2. All records must be linked
  3. Once committed records should be read-only
  4. All changes made must be tracked with time

User defined function (UDF): is a bunch of T-SQL statements which accepts 0 or more parameters and returns a scalar data value or table.

DDL: data definition language – e.g. TRUNCATE command is a DDL command

DML: data manipulation language – e.g. INSERT, UPDATE & DELETE are DML commands

This article is intended to provide basic concept and fundamentals of asp.net MVC (Model View Controller) architecture workflow for beginners.

Introduction:

“M” “V” “C” stands for “MODEL” “VIEW” “CONTROLLER” , asp.net MVC is an architecture to develop asp.net web applications in a different manner than the traditional asp.net web development , web applications developed with asp.net MVC is even more SEO (Search Engine Friendly ) friendly.

Developing asp.net MVC application requires Microsoft .net framework 3.5 or higher.

MVC interaction with browser:

Like a normal web server interaction, MVC application also accept request and respond web browser same way.

Inside MVC architecture:

Whole asp.net MVC architecture is based on Microsoft .net framework 3.5 and in addition uses LINQ to SQL Server.

What is a Model?

  1. MVC model is basically a C# or VB.net class
  2. A model is accessible by both controller and view
  3. A model can be used to pass data from Controller to view.
  4. A view can use model to display data in page.

What is a View?

  1. View is an ASPX page without having a code behind file
  2. All page specific HTML generation and formatting can be done inside view
  3. One can use Inline code (server tags ) to develop dynamic pages
  4. A request to view (ASPX page) can be made only from a controller’s action method

What is a Controller?

  1. Controller is basically a C# or VB.net class which inherits system.mvc.controller
  2. Controller is a heart of whole MVC architecture
  3. Inside Controller’s class action methods can be implemented which is responsible for responding to browser OR calling view’s.
  4. Controller can access and use model class to pass data to view’s
  5. Controller uses ViewData to pass any data to view

MVC file structure & file naming standards

MVC uses a standard directory structure and file naming standards which is very important part of MVC application development.

Inside the ROOT directory of the application there must be 3 directories each for model, view and Controller.

Apart from 3 directories there must have a Global.asax file in root folder. And a web.config like a traditional asp.net application.

  • Root [directory]
    • Controller [directory]
      • Controller CS files
    • Models [directory]
      • Model CS files
    • Views [directory]
      • View CS files
    • Global.asax
    • Web.config

Asp.net MVC Execution life cycle

Here is how MVC architecture executes the requests to browser and objects interactions with each other.

A step by step process is explained below: [Refer figure as given below]

Step 1: Browser request

Browser request happens with a specific URL. Let’s assume that user entering URL like: [xyz.com]/home/index/

Step 2: Job of Global.asax – MVC routing

The specified URL will first get parsed via application_start() method inside Global.asax file. From the requested URL it will parse the Controller, Action and ID.

So for [xyz.com]/home/index/:

Controller = home

Action = index()

ID = empty — we have not specified ID in [xyz.com]/home/index/, so it will consider as empty string

Step 3: Controller and Action methods

MVC now find the home controller class in controller directory. A controller class contains different action methods,

There can be more than one action method, but MVC will only invokes the action method which is been parsed from the URL, its index() in our case.

So something like: homeController.index() will happen inside MVC controller class.

Invoking action method can return plain text string OR rendered HTML by using view.

Step 4: Call to View (ASPX page)

Invoking view will return view() . a call to view will access the particular ASPX page inside the view directory and generate the rendered HTML from the ASPX and will respond back to the browser.

In our case controller was home and action was index(). So calling view() will return a rendered HTML from the ASPX page located at /views/home/index.aspx.

This is it, the whole process ends here. So this is how MVC architecture works.

Most of organizations use proxy server shared internet connection for their internal network. Browsing websites via proxy server requires few settings in browser itself where we set proxy server IP and port to 8080 which is default port, doing so is enough for any 1 to surf internet. But as an SQL server database programmers/developers uses SQL server management studio to connect to remote database from their client computers. Problem arises when a developer tries to connect a remote database server through SQL server management studio but CC Proxy won’t allow connecting to database directly even if developer uses all details correctly.

Why is SQL server management studio not able to connect a remote database?

A very basic thing about proxy server is that all client computers must have to pass all requests to proxy server IP, requests may be from internet browser Or FTP client Or even if its SQL server management studio.

So now if we try to connect a database with original details, proxy server (say proxy server IP is : 48.152.16.36 ) will not allow connecting to database using original Host name.

Because proxy cannot process any request directly, it must come to Proxy server IP first which is 48.152.16.36 (this is a dummy IP, I have used).

How to solve the problem:

Solution is simple; we just have to follow 2 steps as described below. Here we will be configuring CC proxy, SQL server management studio & SQL server configuration manager.

Step 1: Client side settings

Say for example we have following database server details:

Server name : hostname

Login ID : username

Password : password

Port : 1433 [ SQL server uses 1433 port by default, in case if its different then we have to do settings in CC proxy accordingly ]

Traditionally we use above given details directly to connect, if we connect from SSMS (SQL server management studio), it will take user to the screen as shown blow.

Now in above screen if we use Server name:
hostname then proxy will not process the request and SSMS will fail to connect to database server.

So rather than providing Server name:
hostname we have to set CC Proxy’s server IP which is 48.152.16.36. But only this much will not work, because we also need to request CC proxy to a specific port which is not used anywhere else in proxy server. So we will use any port, say we use PORT: 1444 instead 1433 which is default port in SQL server.

So now in above screen we have to set [Server name: 48.152.16.36, 1444] by keeping userID password as it is.

Ok so we are now done with client side settings. But this much will also not work as we have to do few port map settings in CC proxy on server as well.

Step 2: Proxy server side settings

Setting up above step 1 setting in client machine will now request proxy server with the port 1444. So we have to define a PORT MAP setting in CC proxy for port: 1444.

Below are the steps to follow for port map settings:

  1. Open CC proxy 6.0
  2. Go to OPTIONS
  3. Click on port map, it will take you to the screen as shown below

In above screen set the following:

Dest Host : hostname

Port type : TCP

Local Port : 1444

Dest Port : 1433

Save all above details , and we are done.

After this step all client machines must have to connect to database server using Proxy server IP only with a specific port ( in our case its 1444, however we can use any port but it should not be used anywhere else in proxy server).

It always becomes a headache for any blog writers while publishing any article with a rich formatting like a word document, with lots of pictures added inside the blog post.

For all the bloggers like me who have faced problem of rich formatting while posting an article in blog, so guys here is the easiest way to publish your well formatted articles from MS word 2007 itself , even without going to your Blog’s dashboard J

Microsoft word 2007 is providing a great functionality of publishing your fully formatted word document direct to your blog from word 2007 itself. And it’s even easier from the traditional way.

Here are the few steps you have to follow and you are DONE!!

Creating Blog article in word

Step 1: CREATING A NEW WORD BLOG POST

Open MS word 2007, go to menu and select NEW,

You will get the screen as shown below. Now choose “New blog post” as the RED arrow indicates below.

Step 2: WRITING A BLOG POST

Once you choose new blog post you will find the screen as shown below.

Now just like we prepare a word document prepare your full article here, with all formatting and pictures added.

Step 3: SETTING BLOG POST TITLE

As shown in below screen shot set your article title at marked place.

Publishing Blog article to your wordpress blog

Step 1: REGISTER YOUR BLOG ACCOUNT IN WORD 2007


As show in above picture, clicking on PUBLISH will ask you to register your existing blog account by using Blog URL and username/password.


CHOOSE YOUR BLOG PROVIDER as shown below. – I have configured with my wordpress Blog


Fill out all your blog details as shown below.


After submitting above form MS word will validate the details, after verification it will pop up a success message as given in below screen.

With above step now your Blog account got registered in MS word 2007.


Next to this step it will again ask for your blog’s admin username/password to publish the blog on your original blog account.

Finally you will get your article posted onto your blog and will get the message as shown below.


Managing blog accounts and setting article categories in wordpress article

Later on whenever you use word for publishing your blog articles, you will get your account registered and you can manage all your blog accounts as shown below. And also can mark any blog as default.


INSERT ARTICLE CATEGORIES IN BLOG POST

Again setting categories for your blog post is been very easy, all you have to do is just click on “insert category” button as shown below

It will show a full list of all your wordpress blog existing categories in a drop down.

You can also type any new category over here if not in list of existing.


For this article I have given example of WORD PRESS blog, but we can also configure for other blog providers like blogger etc…

!!! ENJOY BLOGGING!!! J